If you want to install pihole into Docker on your Synology NAS, I recommend going down the macvlan route so you can have the container on its own IP address rather than the NAS drive itself.
To create a macvlan, we need to issue some docker commands by hand through the shell, so you will need to enable SSH in the control panel.
Install docker from the Package Manager if you haven’t already, and once inside, head to the registry and download the pihole project.
Choose the latest version
Using file station, let’s create some folders to add persistence to the docker image.
Inside “docker”, create a “pihole” directory.
Inside this “pihole” directory create another “pihole” directory and a “dnsmasq.d” directory
Shell into the NAS drive and navigate to the upper pihole directory on your NAS volume and check that your directories are there!
Whilst still in the upper “pihole” directory, create a resolve.conf file that your “pihole” itself will use before it’s configured.
Add your favourite nameservers. These are Cloudflare’s, as I don’t give google too much information.
Now run the ifconfig command to determine the device name that you want to run the macvlan on!
Here, you can see that we are using ovs_eth0, other OS Versions might use eth0 and latter versions might change again!
Create your macvlan using the following syntax, changing as necessary to outline your network and mask, and the IP that you want to use. So here I am creating a macvlan with IP 192.168.1.252 on the standard 192.168.1.1 network.
Back in docker on the Synology NAS, let’s create a network bridge for the pihole, using a network that is not already defined on that Synology NAS.
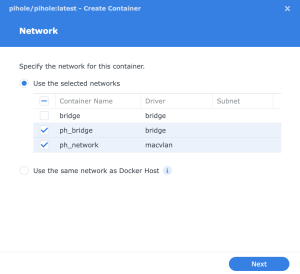
Now head over to the docker images, and “Launch” the pihole image we downloaded earlier and follow the wizard first selecting the bridge and macvlan.
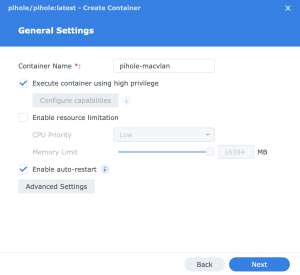
If you want to run DHCP on the pi-hole, then you will need to tick the “Execute container using high privilege”, if you are only using it for DNS leave this unticked.
Tick the “Enable auto-restart” box.
Choose “Advanced Settings”
Here, add the WEBPASSWORD, DNSMASQ_LISTENING, VIRTUAL_HOST & ServerIP values.
Click “Save” then Click “Next”
Confirm that the network port settings are correct as below
Click “Next”
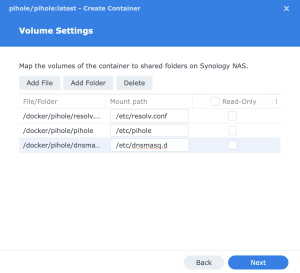
Map the resolv.conf and persistent directories we created earlier onto the container, so it doesn’t lose its config when switched off.
Click “Next”
Confirm the details and click “Done”
Now Navigate to your macvlan IP http://ip-address/admin and enter the WEBPASSWORD you configured earlier.
You should now be presented with your working pihole. You may wish to do some configuration and switch it off and on to test its persistence before your progress.
Once you’ve added a few block lists and had it running for a while, you should see something like this.


